How to turn photos into drawings using Photoshop
Master this groovy photo-to-cartoon effect
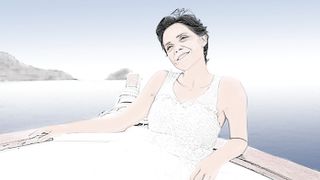
The photograph-to-cartoon effect is ane of our favourite Photoshop effects and it'southward surprisingly like shooting fish in a barrel to achieve. In this tutorial we'll prove you lot how to turn photos to cartoons using an assortment of filters and unproblematic brushwork.
Filters that turn your photos into drawings or paintings have been around in Photoshop for years. Still, in that location have always been two bug with them: first, they've been used to decease, and second, almost of them aren't all that disarming.
To get a good result requires more than just slapping a filter over an prototype - instead you lot'll need to combine filters with hand-painted brushwork and other Photoshop skills.
What you lot'll learn
In this tutorial you'll learn how to plough a portrait into a cartoon caricature with the help of a few Photoshop filters and some painting with the Brush tool.
We'll begin by creating a sketch of our model, which involves an unusual employ for the Gaussian Blur filter. From here we'll use the brush to color in the peel, hair and clothes.

Step ane: Catechumen to sketch
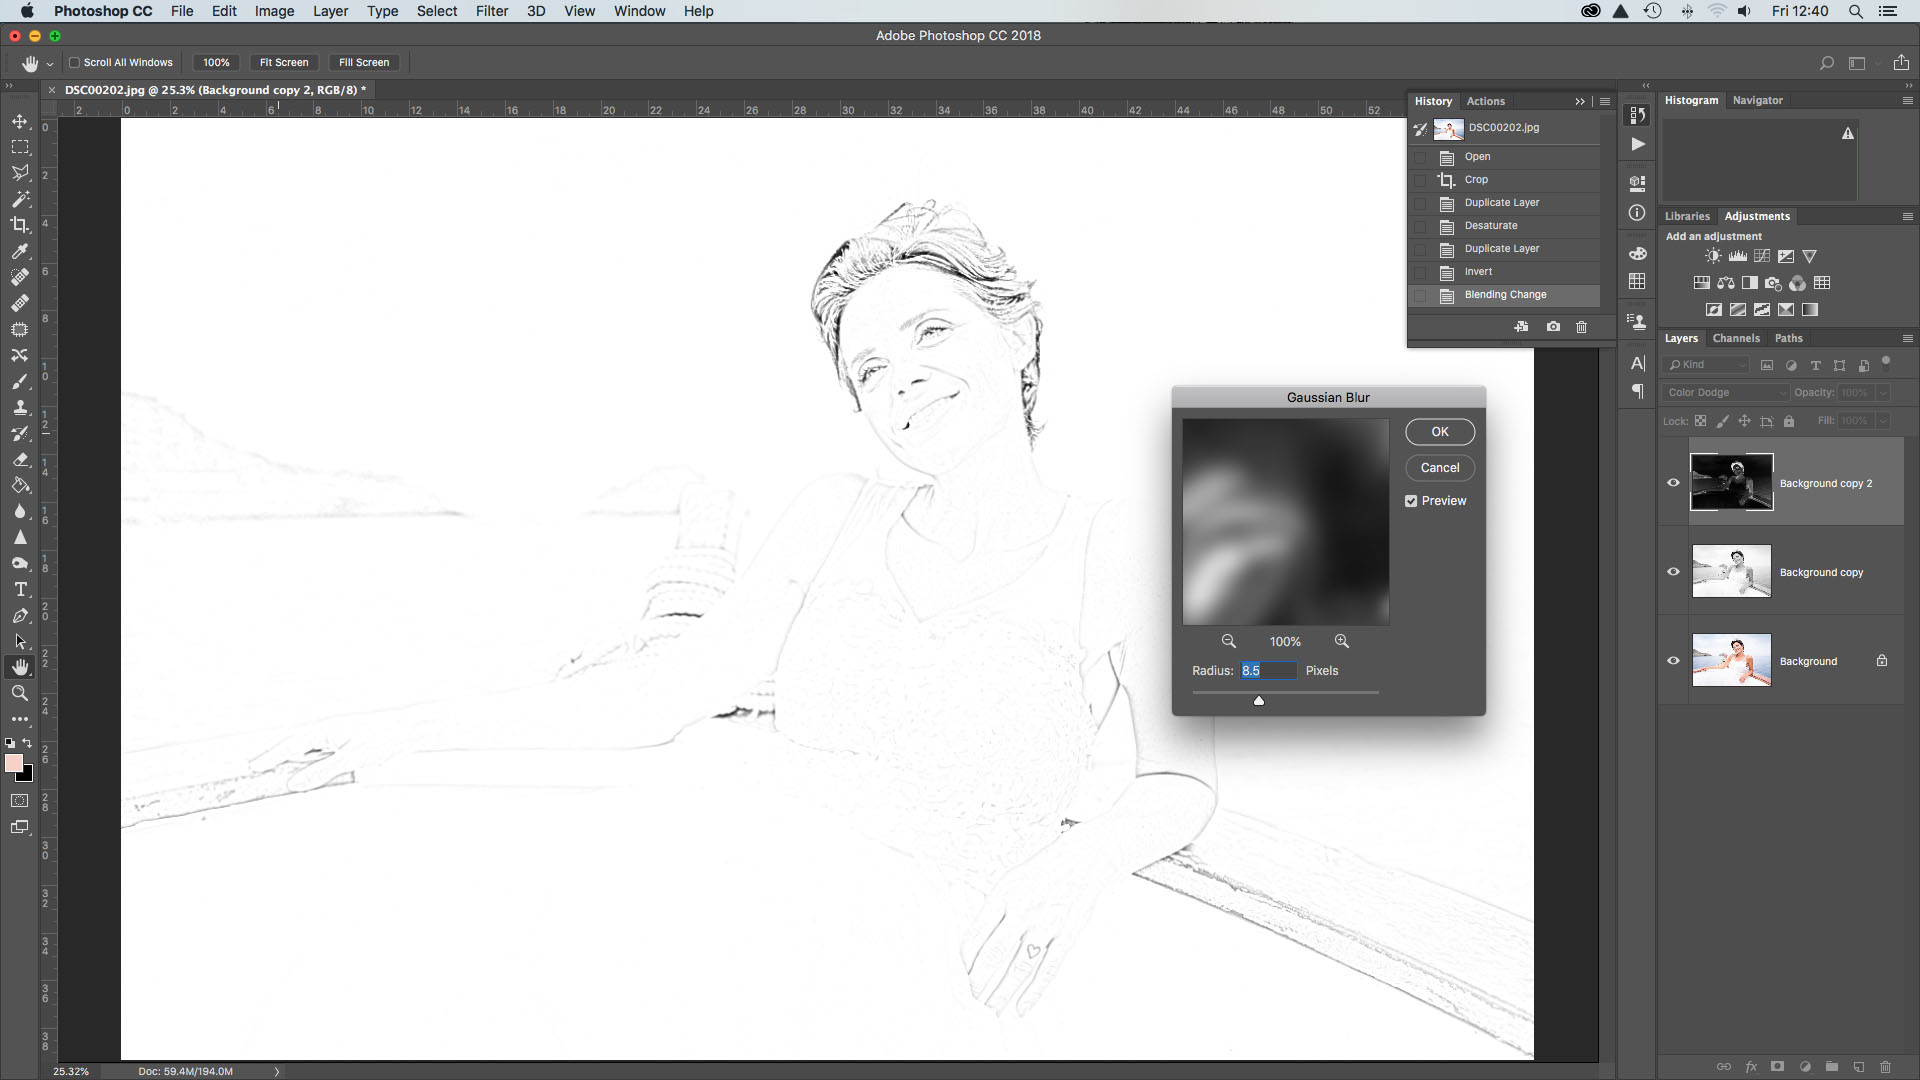
Open your offset paradigm - photos work best with quite unproblematic compositions. Hit Cmd/Ctrl + J to duplicate your background layer, then Cmd/Ctrl + Shift + U to desaturate the new layer.
Afterward you've washed this, hit Cmd/Ctrl + J again to duplicate the new mono layer, and then Cmd/Ctrl + I to invert the tones. Now we need to change the Blend Mode to Colour Contrivance. Don't worry if the epitome goes almost completely white. Then go to Filter > Blur > Gaussian Blur. Set Radius to 8px and hitting OK.
Step 2: Make lines stronger
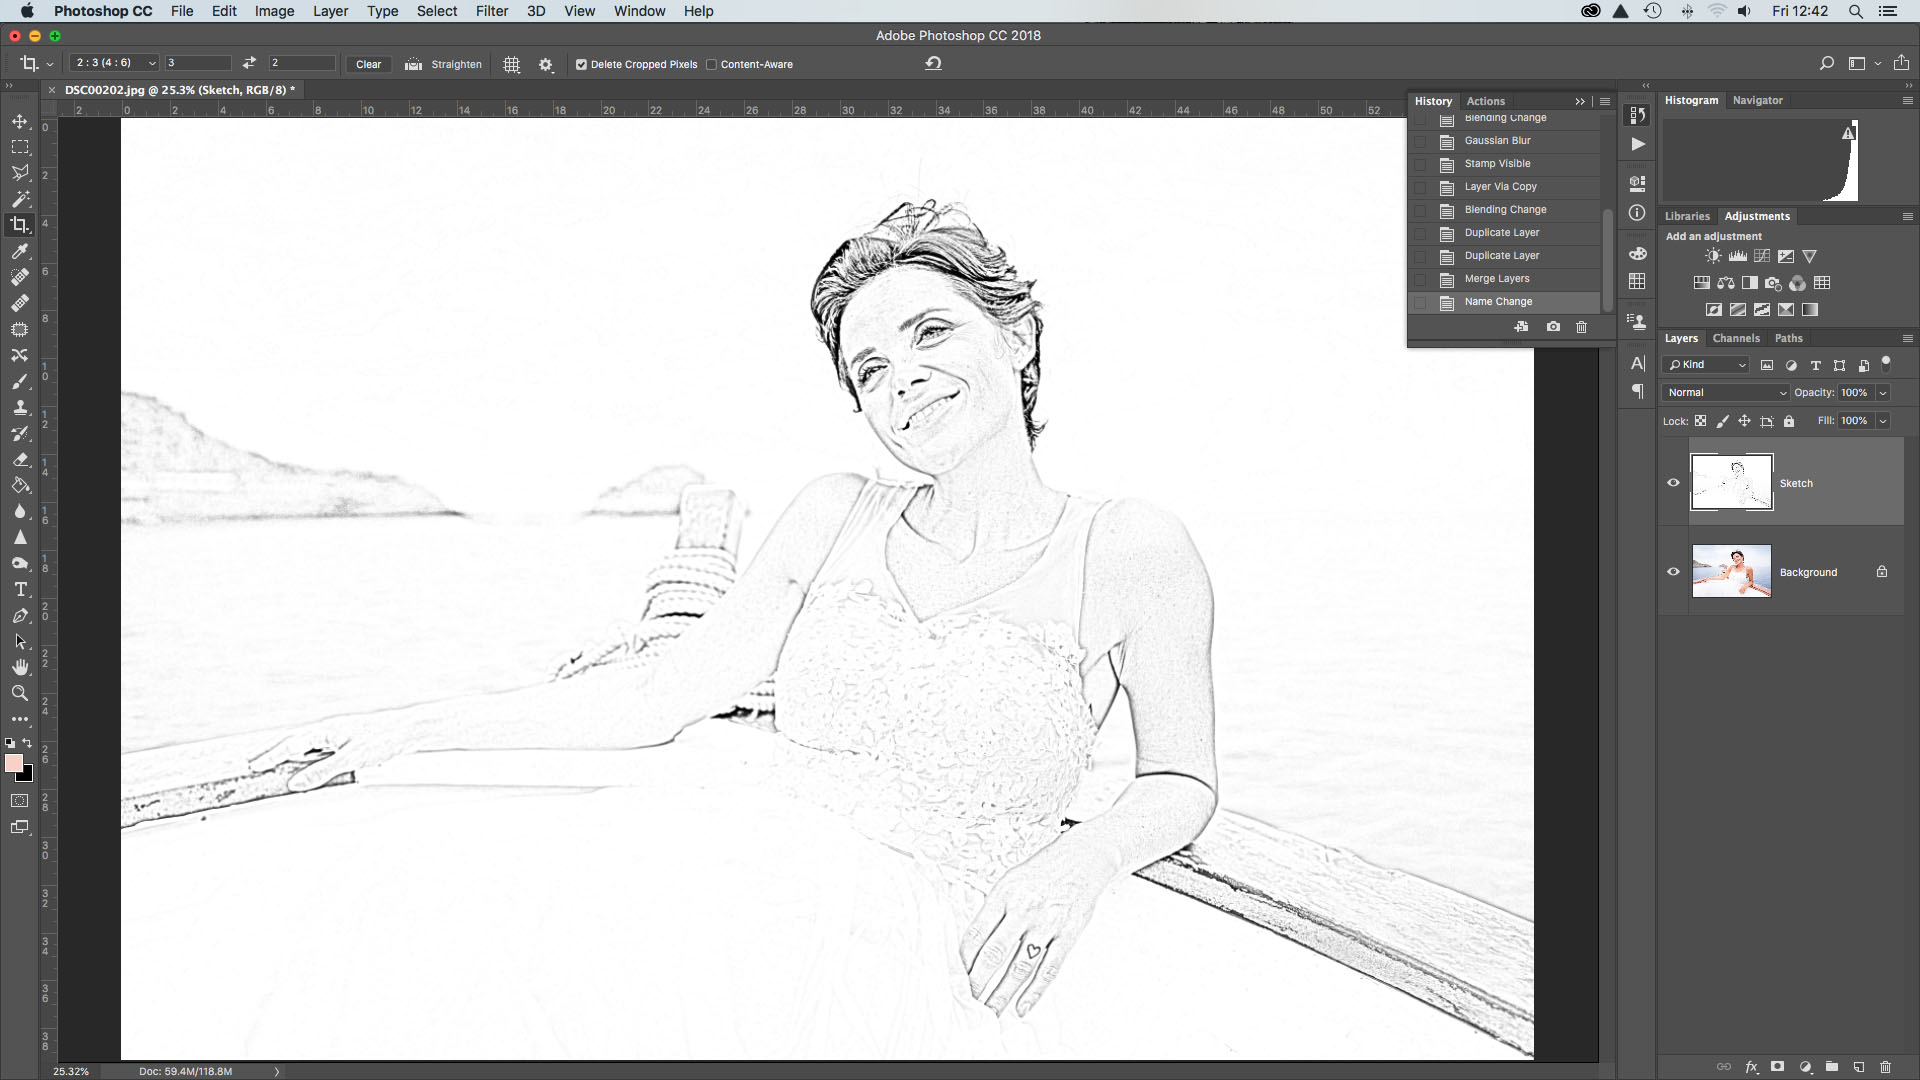
At the moment, the lines aren't looking as defined as nosotros'd similar. To remedy this, hitting Cmd/Ctrl + Shift + Alt + E to merge the layer with the one below, and then Cmd/Ctrl + J to re-create it. Ready the Blend Mode to Multiply, then copy the layer three times to make the lines stronger. Highlight the elevation layer, Shift + click the layer above the background and hit Cmd/Ctrl + East to merge all the layers together with the exception of the groundwork layer. Rename the layer Sketch.
Step 3: Clean it up
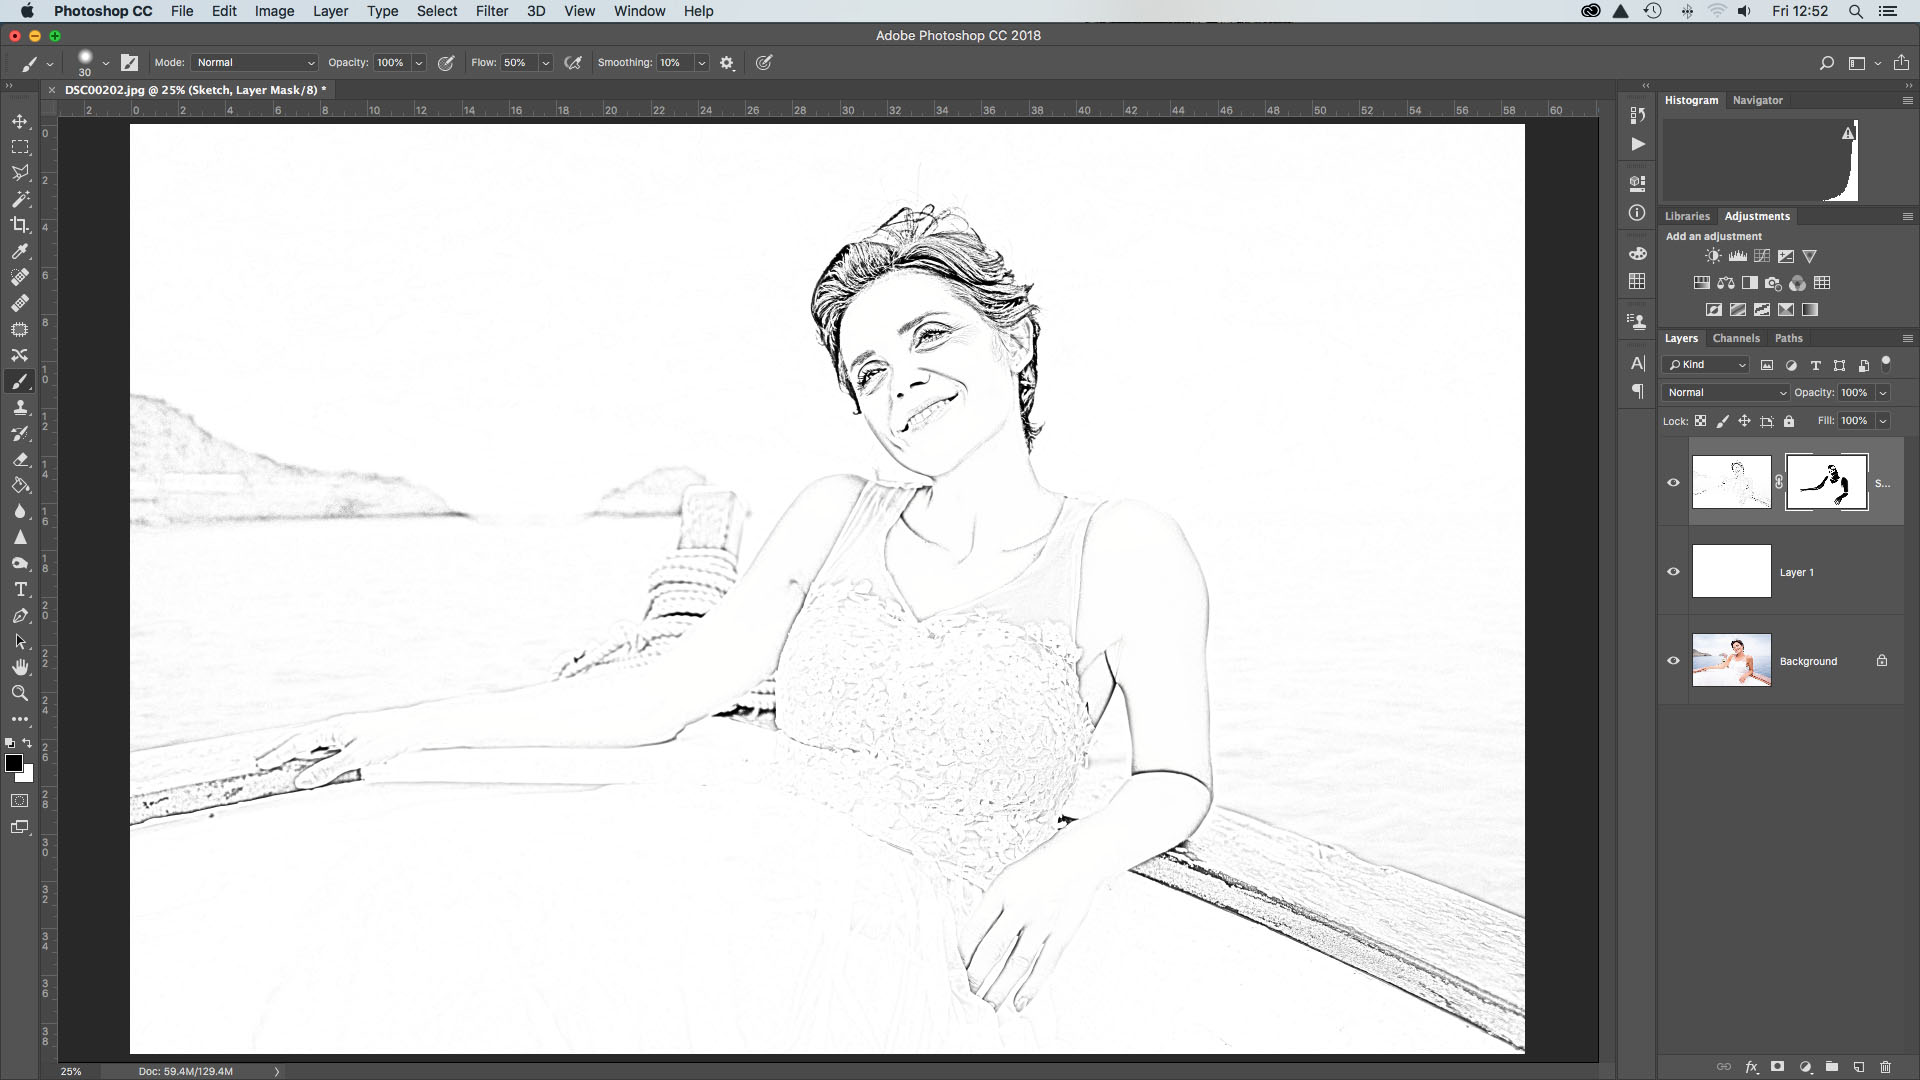
Chances are that the image needs a bit of tidying up. To practice this, make a new layer, drag information technology below the sketch layer, so go to Edit > Make full Layer. Ready Use: White and hit OK. Side by side highlight the Sketch layer and click the Add together Layer Mask icon in the Layers Panel. Grab the Brush tool and ready color to black, then paint to tidy upward the skin, apparel and pilus where necessary.
Step 4: Pigment in colors
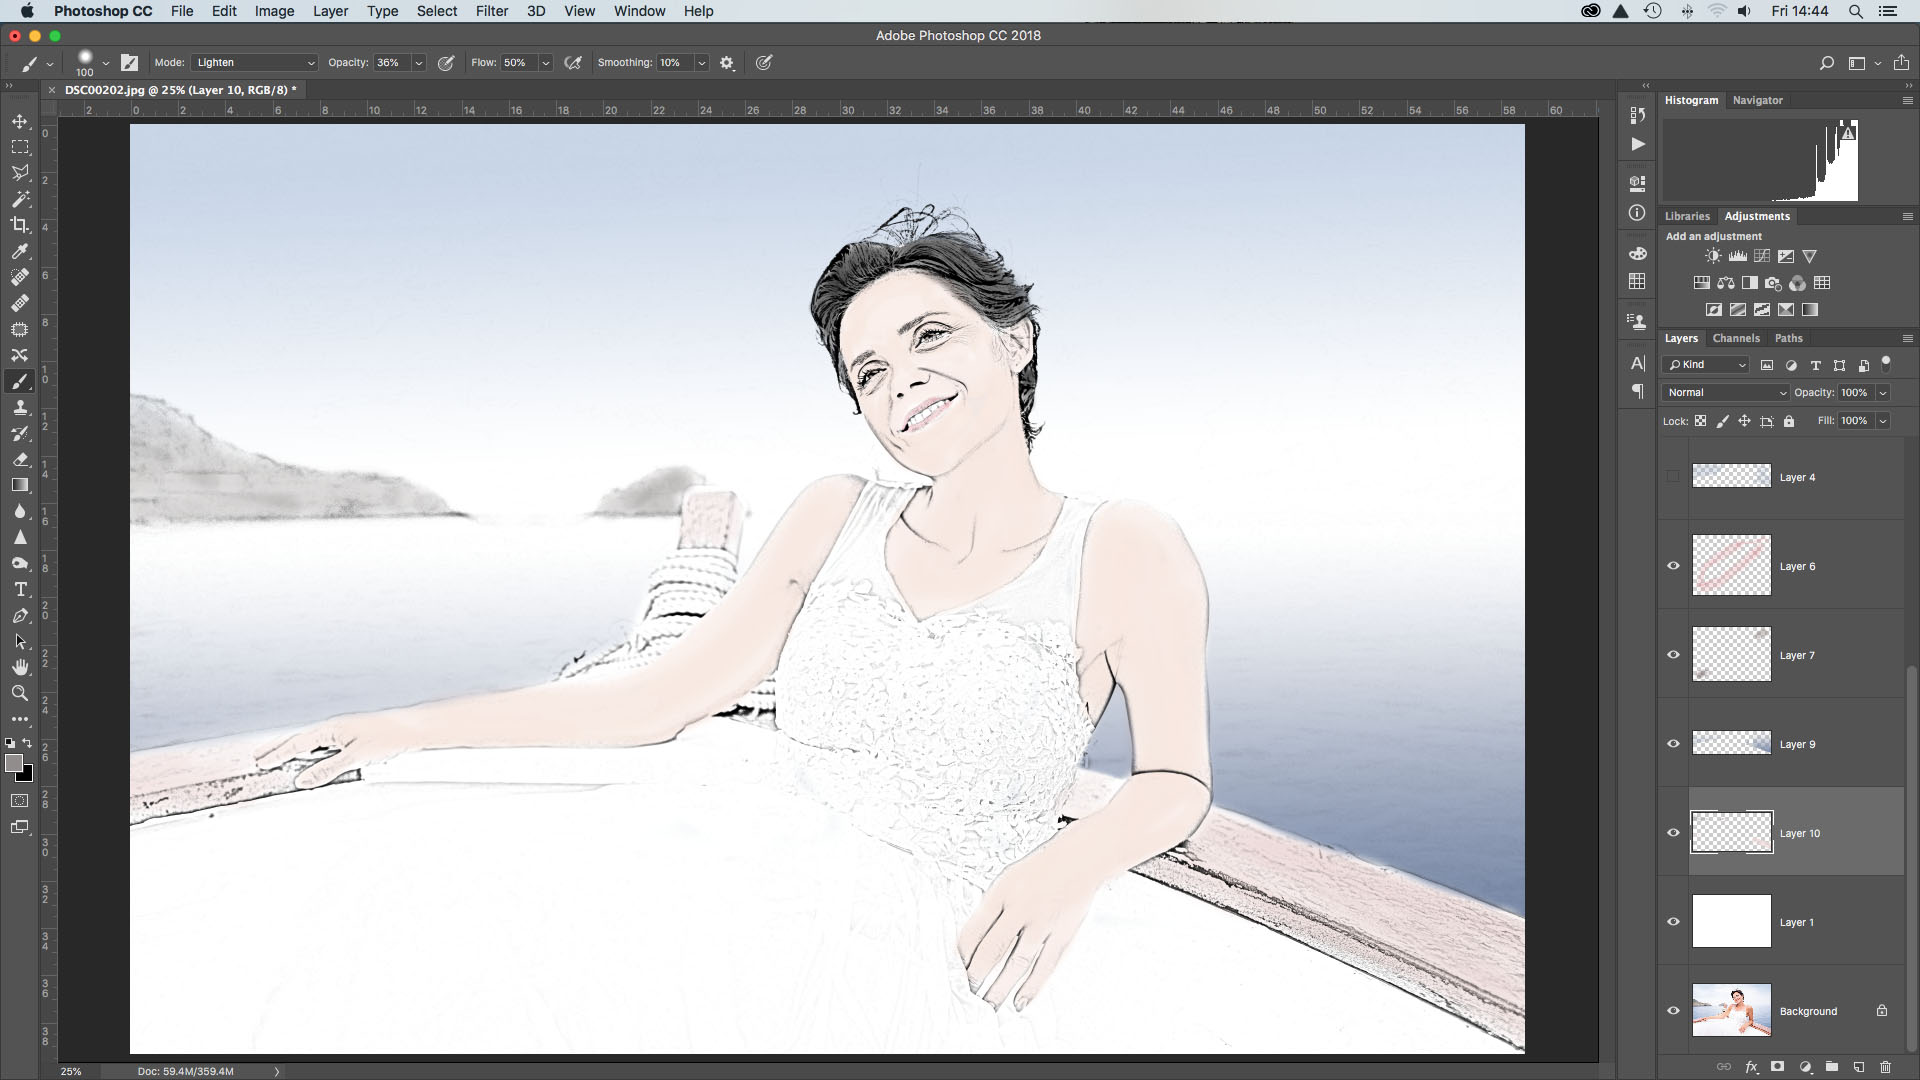
To end off, we'll add dorsum some color, only how much you lot practise is down to personal taste. Beginning up, change the Blend Way of the Sketch layer to Multiply, so make a new layer and drag it beneath. Grab the Brush tool and cull a color for the skin, and so begin painting. Make more than new layers and paint different colors for the hair, eyes, rima oris and and any else yous feel needs information technology. And y'all're done.
- Tin can't afford Photoshop? Here are the best free photo editors
- Best laptops for photographers and photograph editing in Photoshop
- 10 Photoshop editing skills every photographer should know
- The 10 rules of photo composition

Phil Hall is an experienced author and editor having worked on some of the largest photography magazines in the UK, and at present edit the photography channel of TechRadar, the UK's biggest tech website and 1 of the largest in the world. He has likewise worked on numerous commercial projects, including working with manufacturers like Nikon and Fujifilm on bespoke printed and online camera guides, besides as writing technique blogs and copy for the John Lewis Technology guide.
DOWNLOAD HERE
How to Draw Over an Image in Photoshop TUTORIAL
Posted by: germansamigget.blogspot.com


Comments
Post a Comment